Fix a brake light : Identifying a Brake Light Issue
One of the common car issues that drivers may encounter is a malfunctioning brake light. When a brake light fails to illuminate, it not only compromises the safety of the driver but also poses a risk to other road users. Identifying a brake light issue is crucial to ensure a timely fix and prevent any potential accidents or legal troubles.
To determine if there is a problem with the brake light, start by checking if any of the brake lights are not functioning as they should. This can be easily done by asking someone to press the brake pedal while you observe the rear of the vehicle. Make sure to note down any brake lights that do not light up. Additionally, it is important to inspect the dashboard for any warning lights that may indicate a brake light issue. By taking these initial steps, you can promptly address and FIX A BRAKE LIGHT problem to ensure your safety on the road.

Understanding the Brake Light System
The brake light system is a crucial component of any vehicle's safety features. It is designed to alert other drivers on the road when you are slowing down or coming to a stop. Understanding how this system works can help you diagnose and fix any issues that may arise.
At its core, the brake light system consists of three main components: the brake pedal switch, the wiring, and the bulb. When you apply pressure to the brake pedal, the switch is activated, completing the circuit and allowing electrical current to flow to the bulb. This causes the bulb to illuminate, indicating to other drivers that you are applying the brakes. If any of these components fail or malfunction, it can result in the brake lights not functioning properly.
Safety Precautions Before Starting the Repair
Safety Precautions Before Starting the Repair
Before diving into the brake light repair, it is crucial to prioritize safety to prevent any accidents or mishaps. When dealing with the brake light system, it is essential to strictly adhere to certain safety precautions. Firstly, ensure that the vehicle is parked on a level surface and the ignition is turned off. This will prevent any unexpected movements of the vehicle and reduce the risk of electrocution.
Additionally, always wear protective gloves and safety glasses to shield yourself from any potential injury. Brake light repairs often involve working with small components and wiring, which can be sharp or expose you to electrical hazards.
By wearing the appropriate protective gear, you minimize the risk of cuts, burns, or eye damage. Moreover, it is advisable to disconnect the vehicle's battery before starting any repair work. This precaution serves to eliminate the risk of electrical shocks and protects the brake light circuit from accidental short circuits that may occur during the repair.
Gather the Necessary Tools and Supplies
In order to successfully repair a brake light issue, it is important to gather the necessary tools and supplies before starting the job. Having everything within easy reach will help to streamline the process and ensure a smooth repair experience.
Some of the essential tools and supplies you will need include a screwdriver set, a voltage tester or multimeter, replacement bulbs, fuses, electrical tape, and a wire stripper. It is also recommended to have some cleaning supplies on hand, such as a small brush and rubbing alcohol, to remove any dirt or corrosion that may be affecting the brake light system.
Additionally, it is a good idea to have a pair of gloves and safety goggles to protect your hands and eyes during the repair process. By having all these tools and supplies ready before starting, you can save time and effort, making the brake light repair much more efficient.
Removing the Brake Light Cover
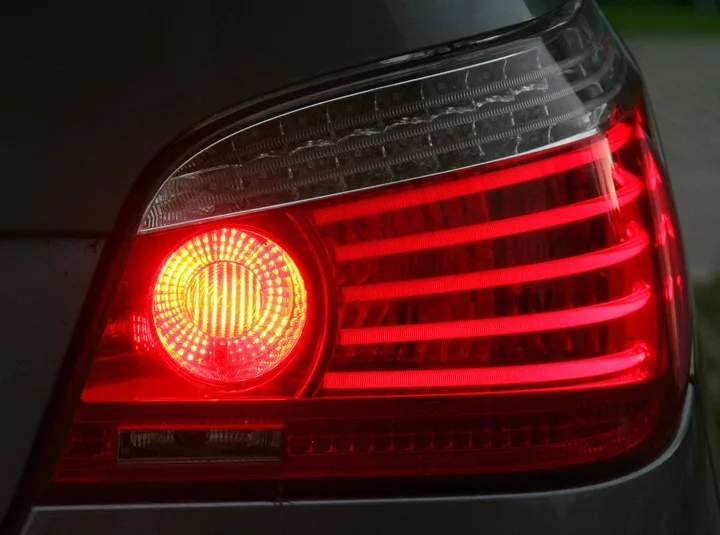
To fix a brake light access the brake light bulb and socket, the first step is to remove the brake light cover. This cover is typically secured by a set of screws or clips, which can be easily removed using a screwdriver or a flat-head tool. Carefully examine the cover for any visible signs of damage or corrosion before proceeding with the removal process. Ensuring that the cover is in good condition will help prevent water or debris from entering the brake light housing and causing further issues.
Once the cover has been successfully detached, gently pull it away from the housing to expose the bulb and socket. Take note of the way the cover is connected, as some may have a hinged design that requires a specific method for removal. In cases where adhesive or sealant has been used to secure the cover, it may require a bit more effort to detach. However, caution must be exercised to avoid damaging the cover or the housing. With the brake light cover removed, you can now proceed with inspecting the bulb and socket for any signs of malfunction or damage.
Inspecting the Bulb and Socket
To fix a brake light inspect the bulb and socket, start by removing the brake light cover carefully. Once the cover is removed, locate the bulb and socket within the housing. Make sure to have a flashlight handy to get a better view of the components.
Next, visually examine the bulb and socket for any signs of damage or corrosion. Check if the bulb filament appears intact and not burnt out. If you notice any cracks, dark spots, or other visible damage on the bulb, it is likely faulty and needs to be replaced. Similarly, inspect the socket for any signs of burning or melted plastic. Also, ensure that the socket connections are clean and free from any debris.
Replacing a Faulty Bulb
To replace a faulty bulb in your brake light, begin by ensuring that the vehicle is turned off and the brakes are not engaged. It is important to take precautionary measures to avoid any potential injuries. Locate the brake light cover on the rear of the vehicle, which is typically secured with screws or clips. Carefully remove the cover using a screwdriver or your fingers.
Once the cover is removed, you will have access to the bulb and socket. Inspect the bulb for any signs of burnout or damage. If the bulb appears cloudy or the filament is broken, it is likely faulty and needs to be replaced. Disconnect the socket from the bulb by twisting it counterclockwise. Then, pull the bulb out of the socket and dispose of it properly.
With the old bulb removed, insert a new bulb of the same wattage and type into the socket. Make sure it is securely in place and connect the socket back to the bulb by twisting it clockwise. Test the brake light by turning on the vehicle's engine and pressing the brake pedal. If the new bulb illuminates, you have successfully replaced the faulty bulb. If not, continue troubleshooting to identify any other potential issues with the brake light system.
Checking and Replacing a Blown Fuse
To fix a brake light ensure that your brake lights are functioning properly, it is essential to check and replace any blown fuses. A blown fuse can prevent the electrical current from reaching the brake light circuit, resulting in brake lights that don't illuminate when activated. To begin, locate the fuse box in your vehicle. This may be under the hood or inside the cabin, depending on the make and model of your car. Use the owner's manual to identify the specific fuse responsible for the brake lights.
Once you have located it, carefully remove the fuse using a fuse puller or a pair of tweezers. Inspect the fuse closely, looking for any signs of damage such as a broken wire or a blackened appearance. If the fuse is visibly blown or damaged, replace it with a new fuse of the same amperage rating. Finally, reconnect the fuse box and test the brake lights to ensure they are functioning properly.
While a blown fuse is a common cause of brake light issues, it is important to note that it may not always be the sole culprit. If you have checked and replaced the fuse, but the brake lights still do not work, there may be other underlying issues such as a faulty wiring connection or a defective switch.
In such cases, it is best to consult a professional mechanic or an auto electrician for further diagnosis in order to fix a brake light. Remember, ensuring the proper functionality of your brake lights is crucial for the safety of you and other motorists on the road. Taking the time to regularly inspect and maintain your brake light system will help you to identify and address any potential issues before they escalate.
Troubleshooting Wiring Issues
When it comes to troubleshooting wiring issues with your brake light system, there are a few steps you can take to identify and resolve the problem. The first step is to visually inspect the wiring harness for any obvious signs of damage or corrosion. Pay close attention to connectors, as loose or frayed wires can often be the culprit. If you encounter any damaged wiring, it will need to be repaired or replaced. In some cases, the issue may be a faulty switch or brake pedal sensor, so checking these components is also recommended in order to fix a brake light.
If the wiring appears to be in good condition, the next step is to use a multimeter to test the conductivity of the wires. Set the multimeter to the appropriate setting and carefully probe each wire to ensure there are no breaks or shorts. If a break or short is detected, it will need to be repaired or the wire replaced. Additionally, it's important to check for proper grounding of the wiring, as a poor ground connection can also cause issues with the brake lights.
Testing the Brake Light Circuit
To fix a brake light ensure that your brake light circuit is functioning properly, you need to perform a series of tests. The first step is to turn on the ignition without starting the engine. Then, press the brake pedal and observe if the brake lights illuminate. If they do, this indicates that the circuit is working as it should.
However, if the brake lights fail to light up, further investigation is required. Check the brake light fuse using a multimeter to see if it has blown. If it has, replace it with a new fuse of the same rating. After replacing the fuse, test the brake lights again to see if they now work. If not, the issue may lie in the wiring or the brake light switch.
To fix a brake light check the wiring, locate the brake light switch underneath the brake pedal. Disconnect the wiring harness and use a multimeter to measure the continuity between the terminals. If there is no continuity, it indicates a wiring problem that needs to be addressed. Start by inspecting the wiring for any signs of damage, such as fraying or corrosion. Repair or replace any damaged wires as necessary. Additionally, ensure that all connections are secure and free from dirt or debris. Once the wiring has been checked and repaired, retest the brake lights to determine if the issue has been resolved.
Reassembling the Brake Light Cover
Reassembling the Brake Light Cover requires careful attention to detail and proper alignment to ensure that it fits securely back into place. Begin by carefully aligning the cover with the brake light housing and gently press it down. Make sure it sits flush against the housing to prevent any water or debris from entering the light assembly. Once properly aligned, use the appropriate tools to tighten any screws or clips that secure the cover in place.
Before finalizing the reassembly, it is important to check that all the other components, such as wiring and sockets, are properly positioned and connected. Inspect the bulb and socket to make sure they haven't moved or become loose during the process. Additionally, verify that any wiring harnesses or connectors are securely attached. Taking the time to double-check these elements will help ensure proper functionality of the brake light system and eliminate the need for further reassembly or repairs in the near future.
Ensuring Proper Brake Light Functionality
To fix a brake light ensure proper brake light functionality, it is essential to conduct a final check after completing all repairs. Start by turning on your vehicle and activating the brakes. Observe the brake lights closely to ensure that they illuminate brightly and evenly. Make sure all the bulbs are functioning properly and that there are no flickering or dimming issues. Additionally, check for any signs of overheating, such as melted plastic or burning smells. It is crucial to verify that the brake lights are responsive and activate immediately upon applying the brakes. Proper functionality is crucial for vehicle safety, so take the time to double-check everything before considering the repair complete.
Once you have confirmed that the brake lights are working as intended, perform a quick test drive to evaluate their functionality in action. Take your vehicle for a short drive and engage the brakes in various situations, such as slowing down, coming to a complete stop, and applying sudden braking force. This will help ensure that the brake lights respond accurately to all braking movements and alerts other drivers on the road. Be attentive and vigilant during this test drive, observing for any irregularities or issues that may require further attention. Remember, maintaining the proper functionality of the brake lights is crucial for ensuring the safety of both you and other drivers on the road.
How can I identify a brake light issue?
To fix a brake light look for signs such as a brake light not illuminating when the brake pedal is pressed, a dim or flickering brake light, or a brake light that stays on even when the brakes are not being applied.
What is the brake light system?
The brake light system consists of the brake pedal switch, wiring, fuse, socket, and bulb. It is responsible for activating the brake lights when the brake pedal is pressed.
What safety precautions should I take before starting the brake light repair?
It is important to wear safety glasses and gloves, disconnect the vehicle's battery, and let the brake lights cool down before working on them.
What tools and supplies do I need for the brake light repair?
You will need a screwdriver, pliers, a multimeter, replacement bulbs, a fuse tester or a multimeter, and a fuse replacement if necessary.
How do I remove the brake light cover?
Use a screwdriver to remove any screws holding the cover in place, or gently pry off the cover using a flathead screwdriver.
How do I inspect the bulb and socket?
Carefully remove the bulb from the socket and visually inspect for any signs of damage or burnt-out filaments. Inspect the socket for any corrosion or loose connections.
How do I replace a faulty bulb?
Disconnect the wiring from the bulb socket, remove the old bulb, and insert a new one. Ensure it is the correct type and fits securely into the socket.
How do I check and replace a blown fuse?
Use a fuse tester or a multimeter to test the fuse for continuity. If it is blown, replace it with a new fuse of the same rating.
How do I troubleshoot wiring issues?
Inspect the wiring for any visible damage or loose connections. Use a multimeter to test for continuity and check if there is voltage reaching the socket.
How do I test the brake light circuit?
Reconnect the battery, have someone press the brake pedal, and use a multimeter to test for voltage at the bulb socket. If there is no voltage, further troubleshooting is required.
How do I reassemble the brake light cover?
Align the cover back into place and secure it with the original screws or clips. Make sure it is properly sealed to prevent water or debris from entering.
How can I ensure proper brake light functionality?
Test the brake lights by pressing the pedal and visually inspecting for a bright, steady illumination. Double-check all the connections and ensure all components are in good condition.